
Before we start I must admit that I’m not a professional DevOps guy but just a regular full-stack developer. So this post will be just about my experience of using build and release management tool to deploy a simplified client side application.
I am used to bundling scripts locally and committing the production ready bundles into the source control. Thus I make it sure that what I developed is what I’ll release to production.
The alternative would be to commit only the source code into the version control and let the build tool do the bundling part of production scripts. This eliminates the extra task of running build script locally.
In this post, I would like you to show how to use Visual Studio Team Services (VSTS) build tool to build a Vue js application using Webpack. And to publish the built package to the Azure App Service using the VSTS’ release tool. Both of which you can try out for free.
For now, I assume that one is familiar with Azure App Service and the VSTS and I won’t focus on how to set up them.
What we are going to deploy?
For this example I will build a simple single page application based on Vue.js and bundle its JavaScript using Webpack. I don’t want to build the production scripts locally but rather delegate this job to a tool. Also to keep my source control clean I’m going to commit to git only the source files.
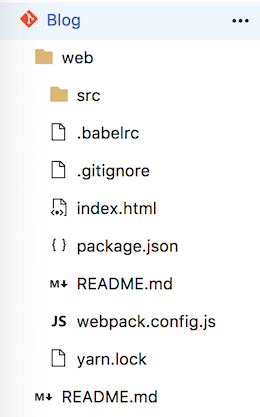
The project consists of index.html file as an entry point for the app. And a /src directory containing couple of *.vue files for views and app logic.
After running the build script it generates /dist directory with production ready code.
Whenever I want to deploy my app I need to copy the index.html file and the /dist directory over to the server.
But as mentioned, I didn't want to commit the production scripts to the version control, but rather delegate the build task to some tool.
The Visual Studio Team Services' build tool
The bundling of production scripts is a perfect task for such a tool. So let's use the features of VSTS and create a new build definition from the Build & Release view.
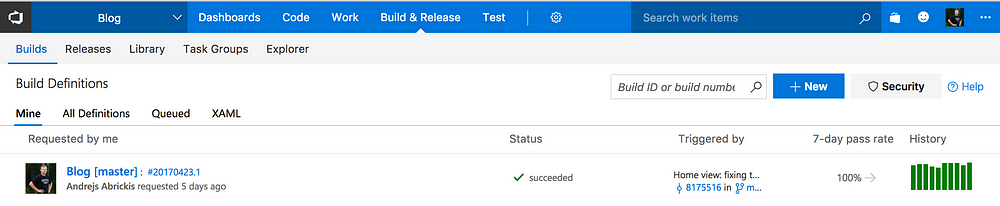
From the Build Definitions we can see the current status as well as some build history and the last commit built. When opening the definition's configuration we can see many options available for us.
The most important tab of a Build Definition is the Tasks tab. Here one can configure many predefined tasks as well as add tasks from VSTS marketplace. Tasks are run by build agent which has its own context and its own file system.
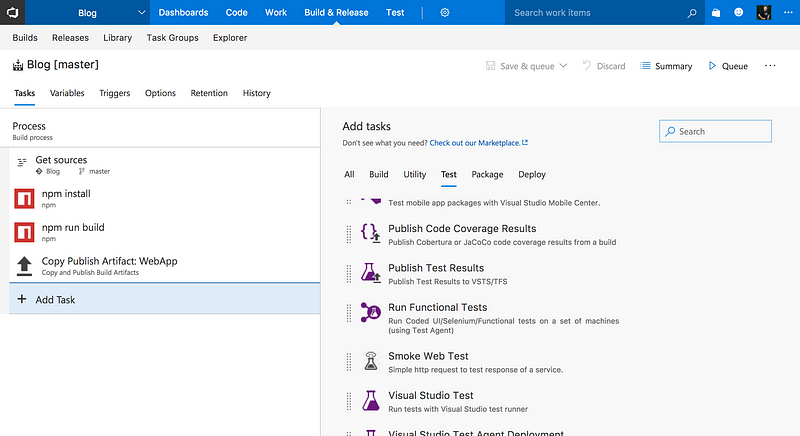
On this particular Build Definition I have configured following tasks:
- Get sources - which downloads the latest source code either from VSTS project's repository or GitHub, Subversion or Remote repository
- npm install is a simple execution of
npm install -fwhich installs all dependencies from package.json - npm run build - runs the
buildscript defined in package.json file creating es a/distdirectory with production ready script - Copy Publish Artifact: WebApp - in this step the build agent prepares an artifact (package) containing files which can be deployed to the production. These artifacts will be available for the Release we will take a look a bit later.

Here's the Copy Publish Artifact: WebApp is expanded and one can see that all what it does in this case is copying the index.html and the /dist directory's content to the artifacts.
Build summary view contains some overall information and statistics about builds.
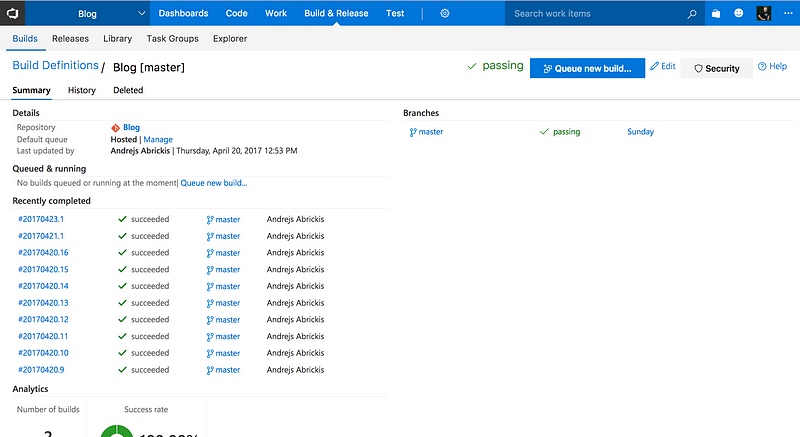
From here we can go further and explore a single build in details by clicking on one of the recently completed builds
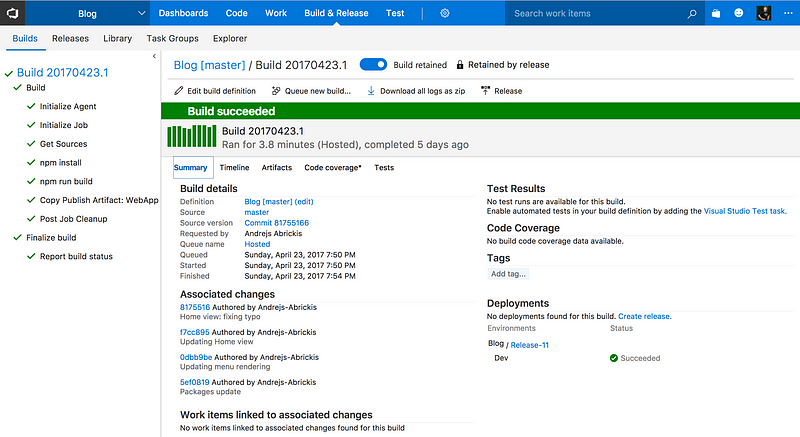
On build summary view there's information about when it was built and how long it took. Which changes were included in the build. Test results and code coverage if such tasks are configured on build definition. Also it shows the release version if this build has been released (deployed).
Before moving forward to the Releases section let's take a quick look on Build's Artifacts tab.
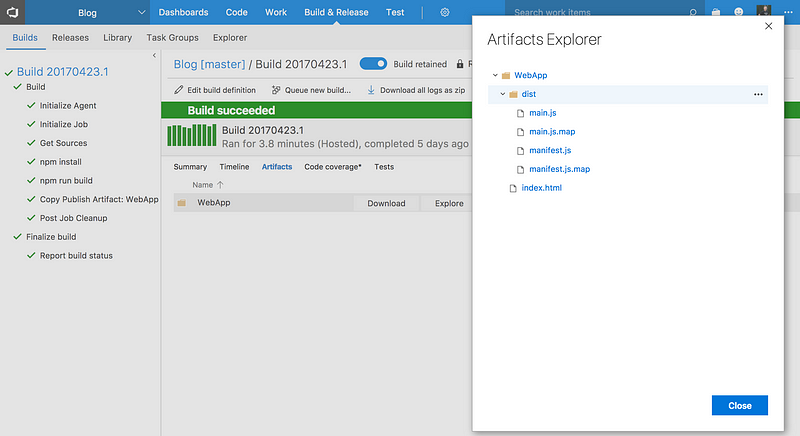
This tab allows us to Download or Explore the package which is created for release. Under the Explore action, VSTS shows the output of last build task (the Copy Publish Artifact: WebApp). And as you can see from the Artifacts Explorer it contains the index.html and a /dist directory with all the built JavaScripts. Next step is to deploy the artifacts.
Releasing the version
The release overview contains all your release definitions and the overall information of releases. For example, which build was deployed, when it was deployed and what's the status of the release. The gray one on the bottom indicates version which hasn't been deployed.
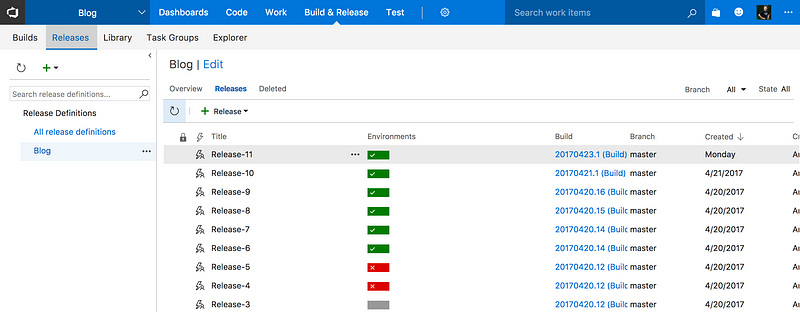
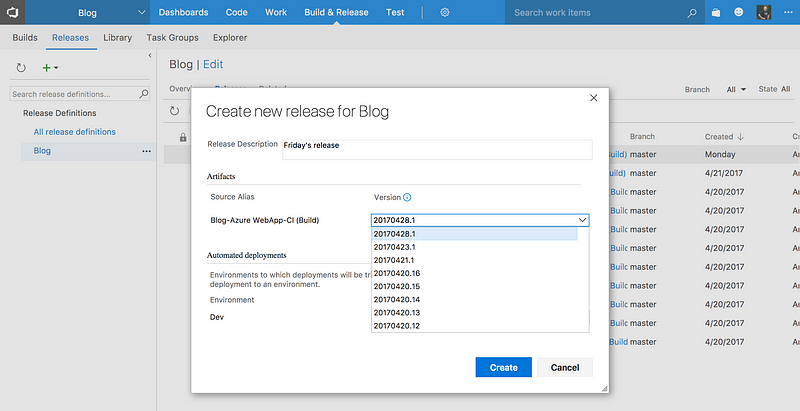
From the release definition's overview one can create a new release by choosing specific build to deploy.
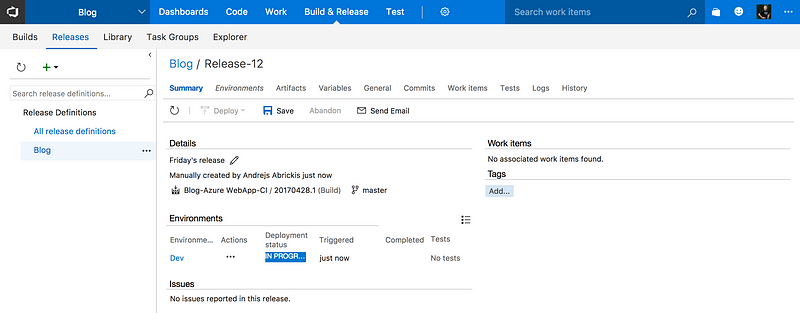
By navigating to particular release the summary of release gets revealed. From here one can access many subsections and explore which artifacts were deployed, set variables to be used deploying the release. As well as see which commits are released compared to previous releases as well as see the logs of the current release.
Of course, the most important tab is the Environment tab where you can configure the deployment process by setting tasks the agent must do to release the version. In my example I’m deploying the artifacts to Azure App Service and after the deploy, I run the smoke test to see if the service is up and running.
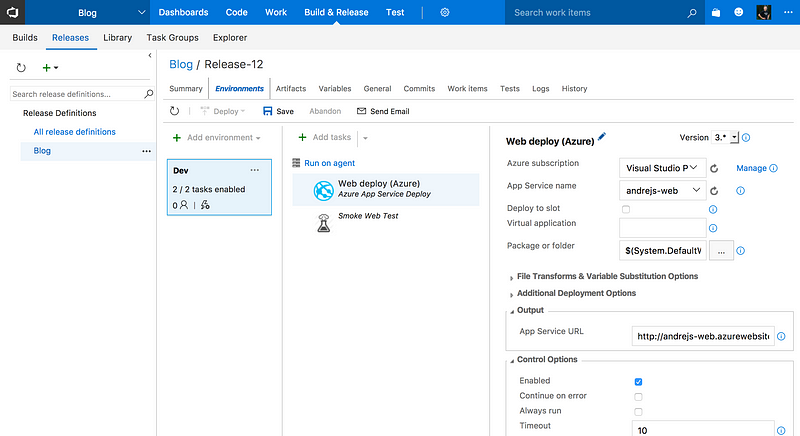
You can see here that multiple environments for example, Dev, Staging, Production, etc. can be defined. And each of those environments can have different tasks which should be done when deploying.
Hopefully, you find this very basic introduction to Visual Studio Team Services interesting and encouraging to try it out. I personally find VSTS a very powerful and useful tool to improve the building and release process of a web app.
Also, it suits well for code and project management. As VSTS includes both git for source control and similar to JIRA project management tool. All integrated through the whole process of planning, developing, releasing and maintaining a project.
Conclusion
So this was my first experience with Visual Studio Team Services. It was pretty straight forward as I have worked with some other build and release tools like Jenkins, TeamCity and Octopus Deploy. The only hitch was to set up the Copy and Publish Build Artifacts task to include only the files necessary. But in general, within a couple of hours, I was able to setup whole build and release process.
Here's the result of the deploy in case you're wondering what exactly did I build in this example. And If you want to know how to setup the .NET Core build and release process (which I'm researching right now) just let me know.